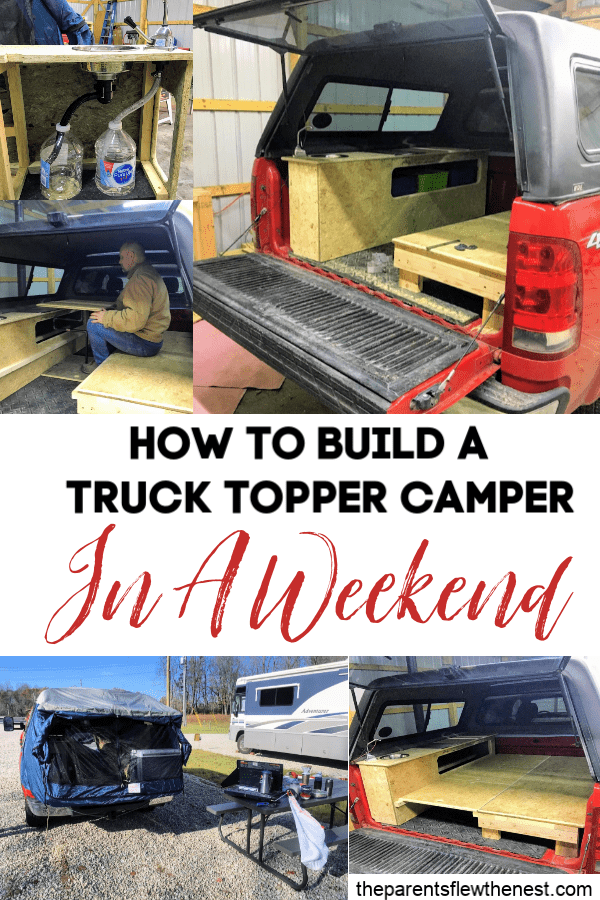
If you own a truck with a topper, you can have a camper that sleeps two. It isn’t hard to build a DIY truck bed camper; all you need is a weekend and a few essential items.
How To Build A Truck Topper Camper In A Weekend
(Links in this post are affiliate links. I will be compensated when you make a purchase by clicking those links. See disclosure page for more information)
If you are wondering what happened to our minivan camper–our son totaled it. He was okay, and we did receive money from insurance to replace it, but we decided to use it to buy a car for our son to drive to college and back and use the truck as a camper.
We figured it offered us a few things the interior of the minivan camper didn’t. Such as a kitchen area we could use from inside the truck topper. A way to turn the double bed into a couch of sorts so that we could hang out in the camper if we needed to.
Being able to have the bed take up half the floor space during the day as it does at night also gave us better access to the storage underneath the bed.
One last benefit of a self-built truck canopy camper over a minivan camper was larger areas of bug-free (i.e., .screened) ventilation. A truck cap generally has windows with screens that open reasonably wide. You can purchase screens that stretch large enough for most minivans’ front windows (these fit our Honda Odyssey with a bit of creative stretching), but they only fit the front windows, and since you are sleeping in the back, the breeze they provide isn’t where you would want it to be on a hot night.
Why There Are No Measurements In This DIY Truck Bed Camper Guide
This tutorial is to be used as a guide to help you build a truck topper camper. I have not included measurements or exact plans because almost all makes and models of trucks have different pickup truck bed measurements and truck canopies come in all sorts of different shapes as well, which could affect what you can and can’t build in your truck bed camper. You need to accurately measure your truck bed and use its measurements to create your truck topper camper plans.
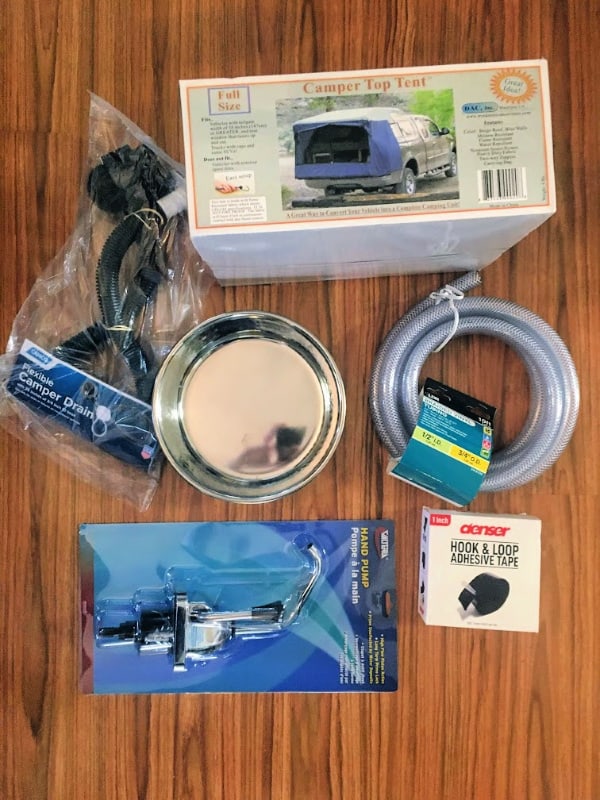
The Basic Supplies We Ordered To Start Our Truck Camper Build
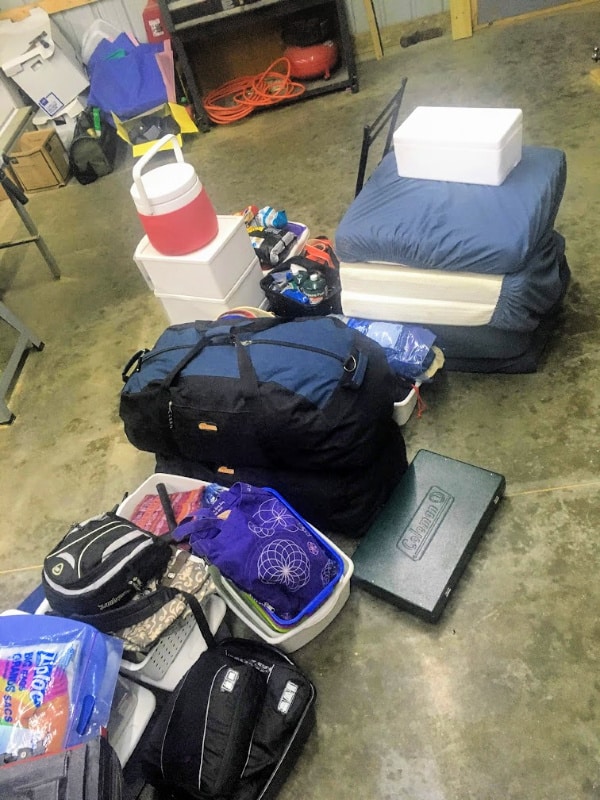
My husband already had the lumber we needed as well as plenty of screws. We had mattresses and other essential camping gear from our minivan camper. So what you see in the picture above is the bulk of what we bought for this build, plus a few more items for the water set up and the table.
It goes without saying that you need a truck topper, check Facebook Marketplace for a good deal on a used one, or if you want a more portable option, you should consider this truck tent with its heavy-duty canvas, high roof, and awnings that allow you to keep windows open for air-flow even when it is raining)
A few necessary supplies you will need to build your camper beyond lumber and screws
- Hand Pump Faucet
- Some type of small metal container to use as a sink–we used this
- Nylon Poly tubing for the fresh water.
- Flexible camping drain for the grey water tank
- Truck Tent–optional but sure does make the camper roomier and increases airflow.
- Stick on Velcro–for the privacy curtains
- Material for blackout curtains –I used a pair of blackout curtains we were no longer using in our home.
- Two space saver single mattresses—we have this brand that folds into thirds, and we find them extremely comfortable. Two placed side by side makes a double bed.
- Two small containers that you can use as a grey tank and a freshwater tank–When you get into the pictures of the build, you will see that I just used an ordinary water jug that you can find at most grocery stores in the water section.
- Battery-operated puck lights
A few more basic supplies you might not have if you are new to camping
- Cooler–we have two different types of coolers that we bring along with us for a weekend of camping. One is a soft-sided cooler similar to this one that holds all our drinks and keeps them cold all weekend long with just a few reusable ice packs. The other is a 12-volt cooler that holds all our food. We keep it plugged in while driving or at campsites with electricity. We put two large ice packs in this second cooler to help keep the food cold if we should not be around power.
- Camping stove–we have a basic camp stove that has served us well for years.
A few things that make camping a bit more comfortable
- Rechargeable fan–the trick to keeping a camper without air conditioning cool enough at night for sleeping is getting as much ventilation as possible and increasing airflow. A truck tent will help with ventilation, and a rechargeable fan will provide airflow even if you don’t have a source of electricity at night.
- A portable power source—We have 3 of these small chargers that can easily be slipped into your pocket or purse to keep your smartphone charged for pictures of your adventures. These charge a smartphone one and a half times before they need recharging. If you want to plug in additional items such as a small cooler, fan, etc., I suggest investing in a portable battery pack. We have a NOCO Boost 4000 that we can use for charging our tablets, as a source of light, and even to jump our vehicle battery if we become stranded while camping in the backwoods.
- Camp chairs–Storage space is tight when you camp in your vehicle, so we invested in two lightweight camping chairs similar to these that take up less room than a loaf of bread. However, if I were to purchase them again, I would spend the additional money and get the high-back version, which doesn’t take up more space, but seem like they would be better suited for relaxing than the bucket seat version.
- Small folding table–If you take advantage of free campsites on BLM land, they don’t come with picnic tables so having a folding table that you can get out and place your camp stove on makes cooking a whole lot more comfortable.
- A source of heat–If you camp all year as we do, you are bound to run into cool overnight temperatures. To keep us warm, we have an electric blanket in our bed and turned it on for about 30 minutes before we crawl into bed. You can also pre-heat your area with a small propane heater (we own and are happy with this one) or a small electric heater (this one heats 200 square feet and shuts off if it gets tipped over). If you choose to use a heater, be sure to read and follow the unit’s safety recommendations and install a carbon monoxide detector for safety. Most do not recommend that you sleep with them on; however, they are handy to warm your sleeping area before you turn in for the night and then to warm it again once you are awake.
You probably already have everything else you might need around your house, like bedding (you don’t have to have sleeping bags) and necessary kitchen supplies.
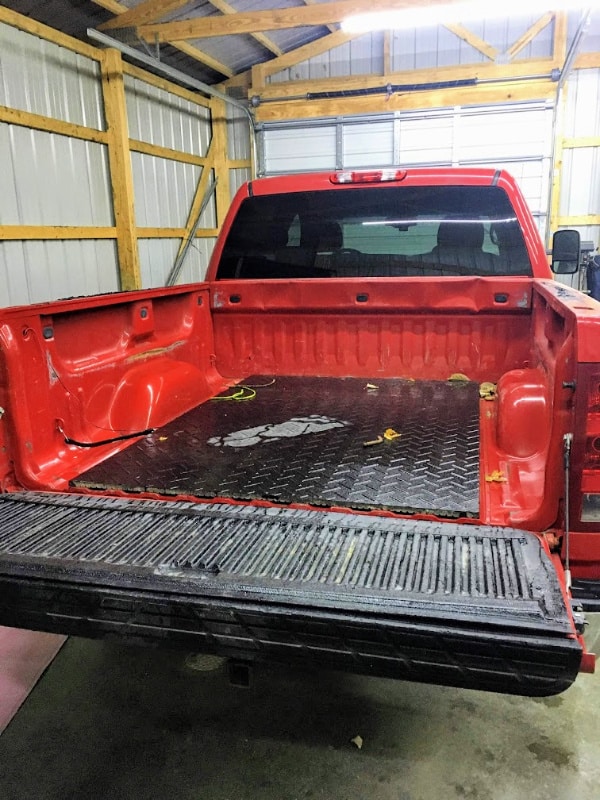
Your First Step For Making A Truck Canopy Camper: Clean And Measure Bed
As I stated above, this picture tutorial does not contain measurements since they vary from manufacturer to manufacturer and model to model.
One tip: measure the width closest to the truck cab, in the center of the truck bed, and once again near the tailgate, as many truck beds are tapered. This makes for some fun building (not), but with a bit of math and a few re-cut pieces of wood, you can work around it.
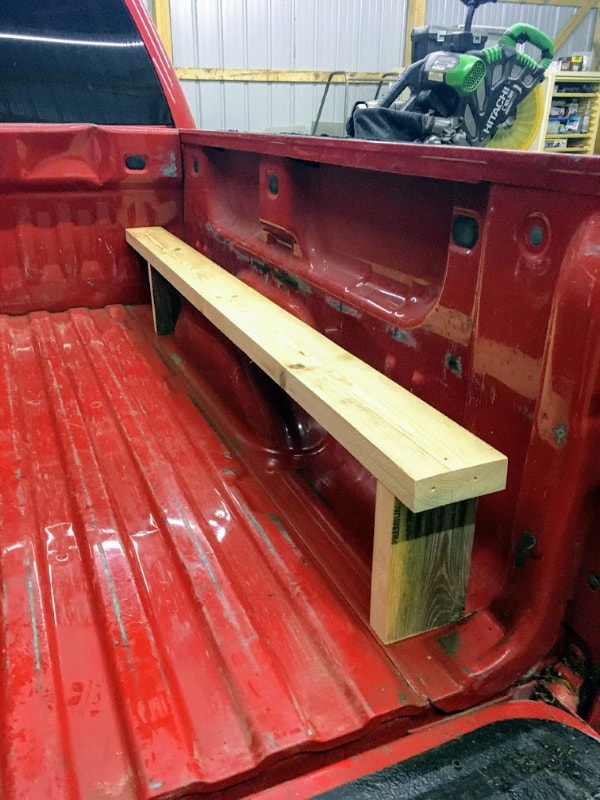
Start By Building The First Bed Support
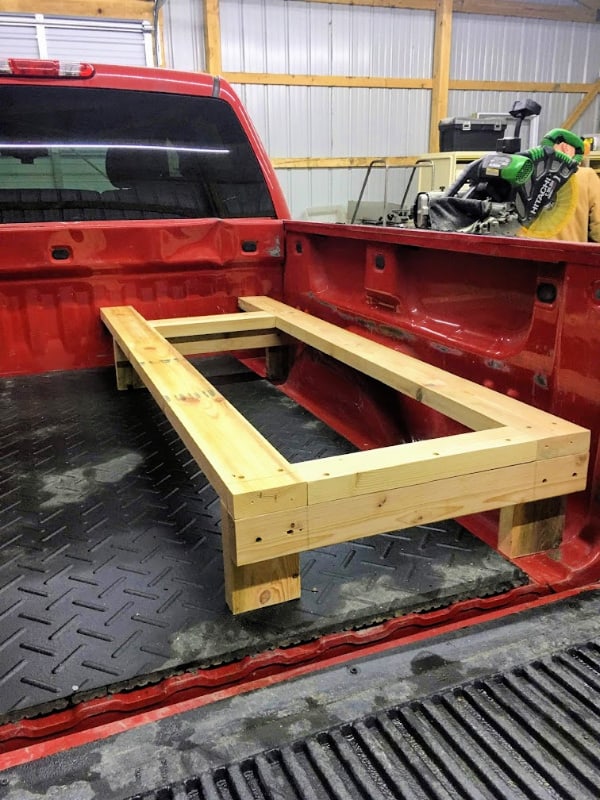
We started with the bed frame. To make the most use of the space, we built our sleeping platform to sit over the wheel well. Our truck bed measured just under 6 feet, so we built the bed frame to fit the entire truck bed length. If your truck has either an 8-foot or 10-foot bed, you can make your bed frame the standard length of a mattress, which is 75 inches, and then use any additional room for more storage.
Move On To Creating The Rest Of The Main Bed Platform
The bed frame in our truck camper design is built in two halves; each is the width of these memory foam 4-inch thick sleeping pads that we love! We then used the rest of the truck bed’s width for the cabinet containing our water system and storage area.
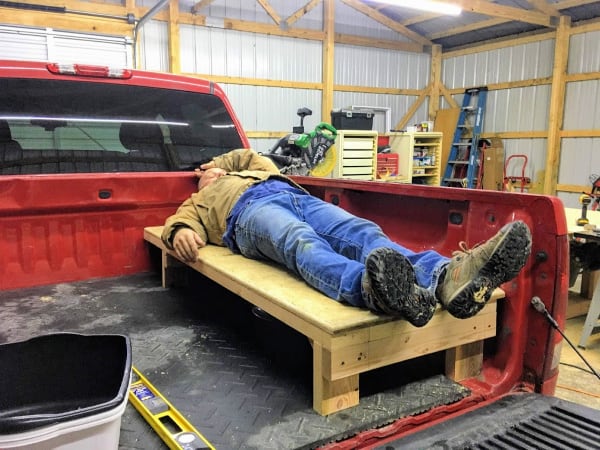
Try It Out
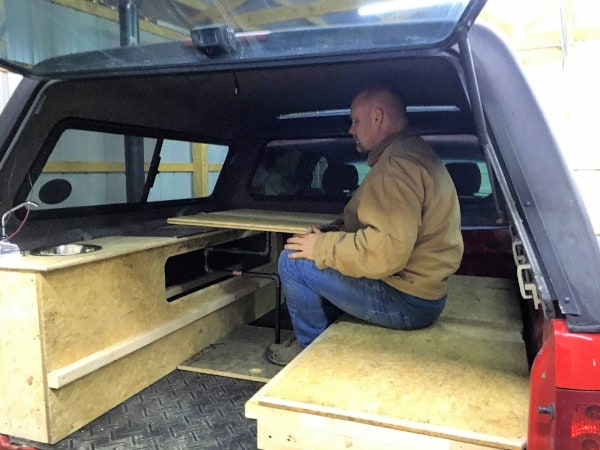
You will notice that my husband’s feet stick over the end of the bed platform -that is because our GMC truck bed is just under 6 feet in length. This is another reason why we invested in a truck tailgate tent. The tent provides more length to the truck canopy camper allowing us to sleep more comfortably than when the tailgate is closed.
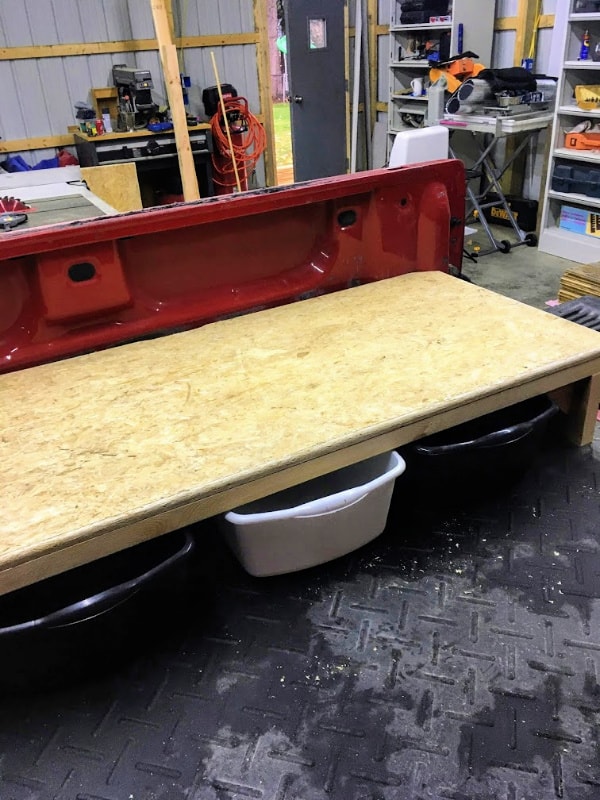
Figure Out What Storage Bins Will Fit Under The Main Bed Platform
We found that plastic dishpans slide under our sleeping platform nicely, making it easy to corral our stuff.
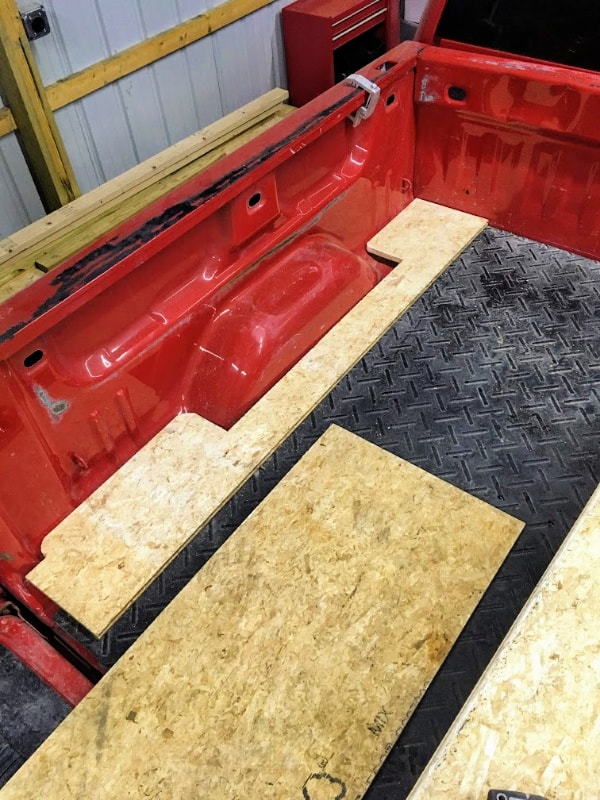
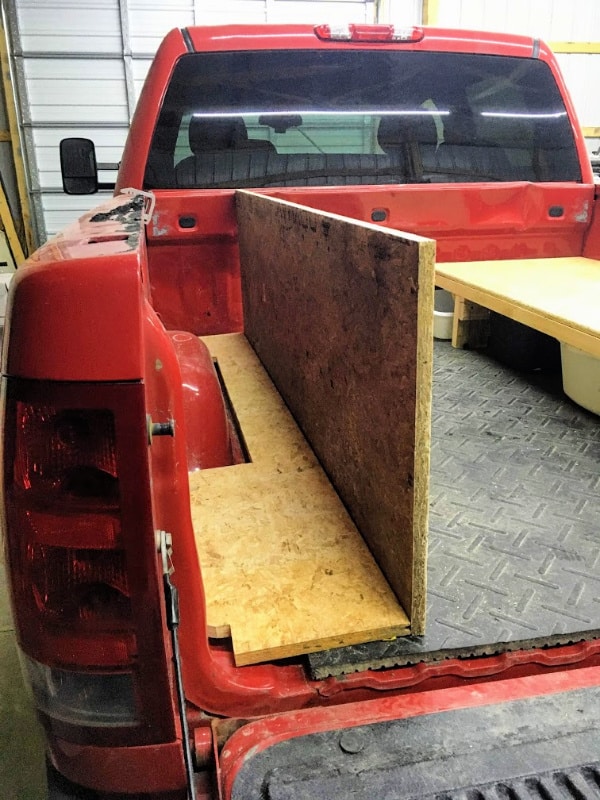
Cut The Base Of The Storage Cabinet Of Your Truck Camper To Fit Around Wheel Well
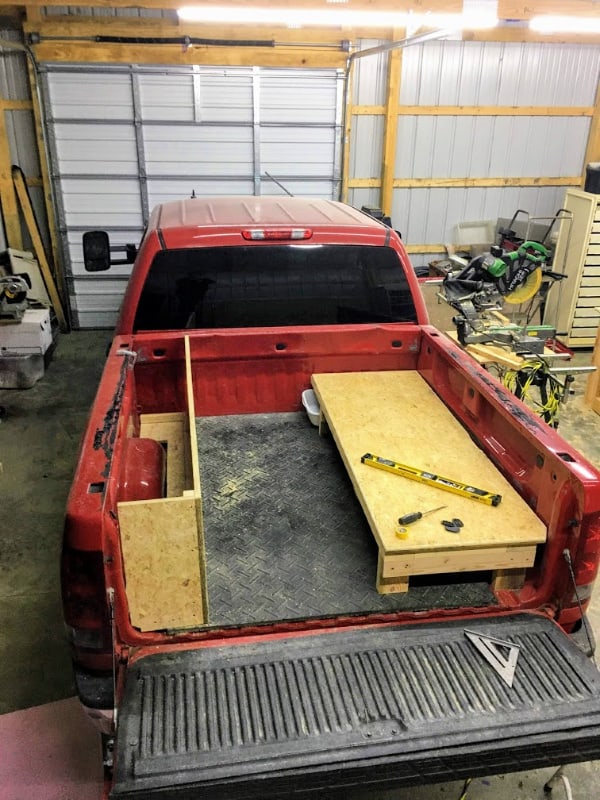
With one side of the bed done, we were then able to measure just how much room we would have for a cabinet and started with making the base for it.
Cut The Side Of Your Truck Canopy Camper Storage Cabinet
We made the height of the cabinet match the height of the truck bed sides.
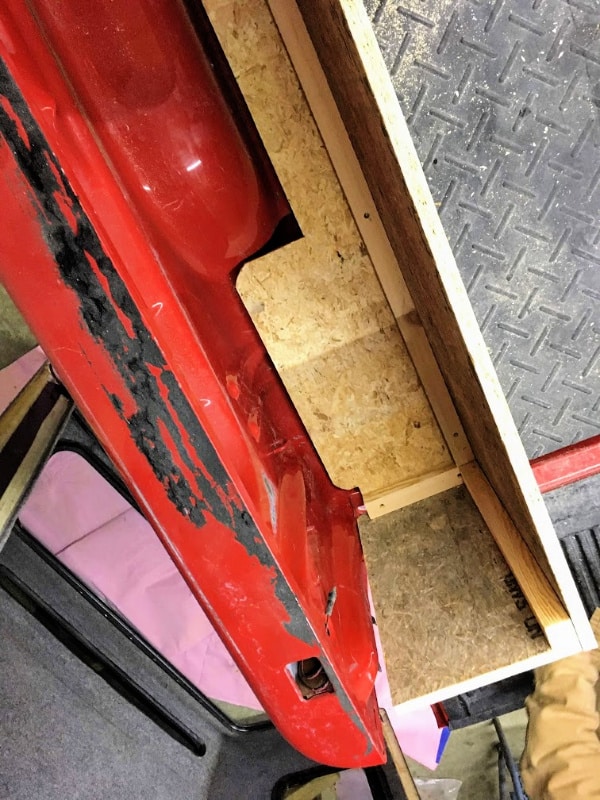
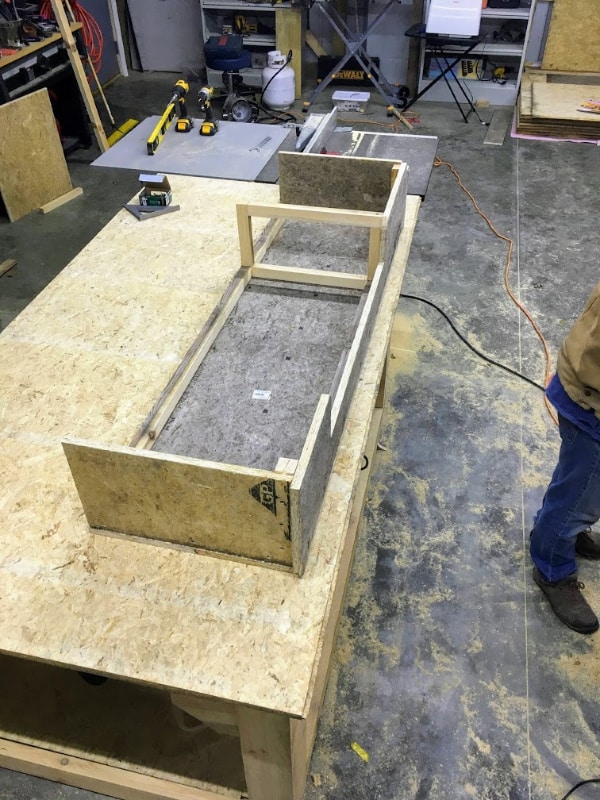
Build A Truck Bed Cabinet Frame and Attach The Bottom And Front
We used one-inch by one-inch lumber to make the frame of the cabinet.
First Peek At What The DIY Pick Up Truck Camper Will Look Like In Day Mode
During the day, you can put one-half of the bed away so that you can sit in the camper if you need to. This will allow you to access the storage areas easier and to make food inside the camper if necessary.
We are both under 6 feet tall, so we found that we could sit up in the camper when one sleeping mat was on the bed frame but not two. Thankfully our bed mats fold, so we just folded one and placed it at the end of the walkway nearest the truck cab.
Having a setup like this was handy when it was not the best weather outdoors. We had a place to hang out and read or watch Netflix downloads.
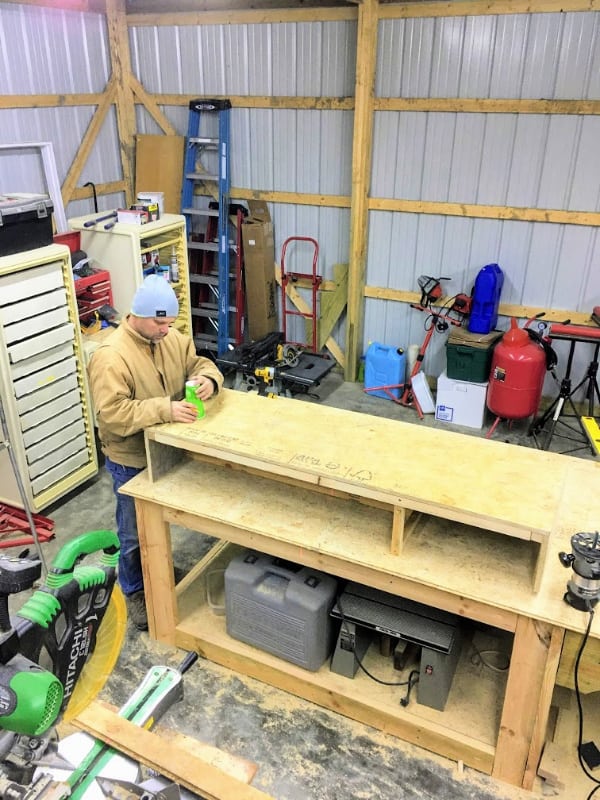
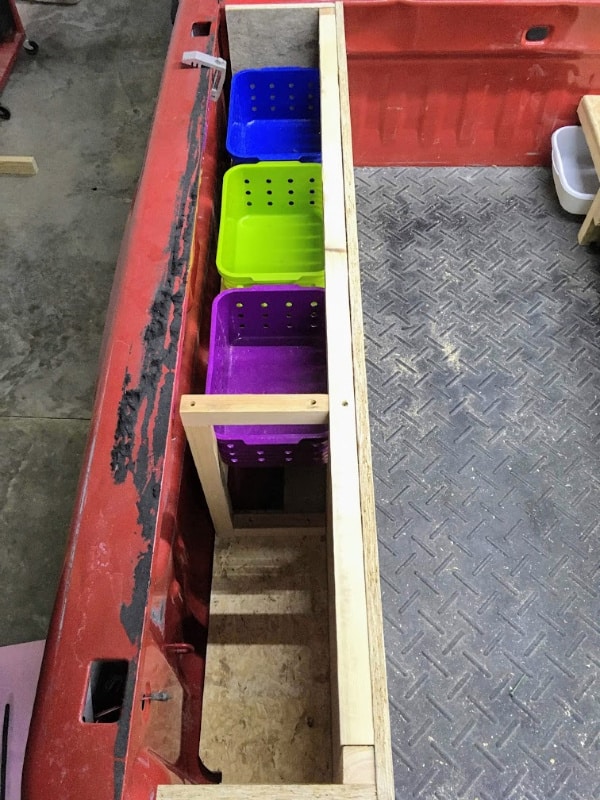
A Look At The Hand Built Truck Top Camper Cabinet From Another Angle
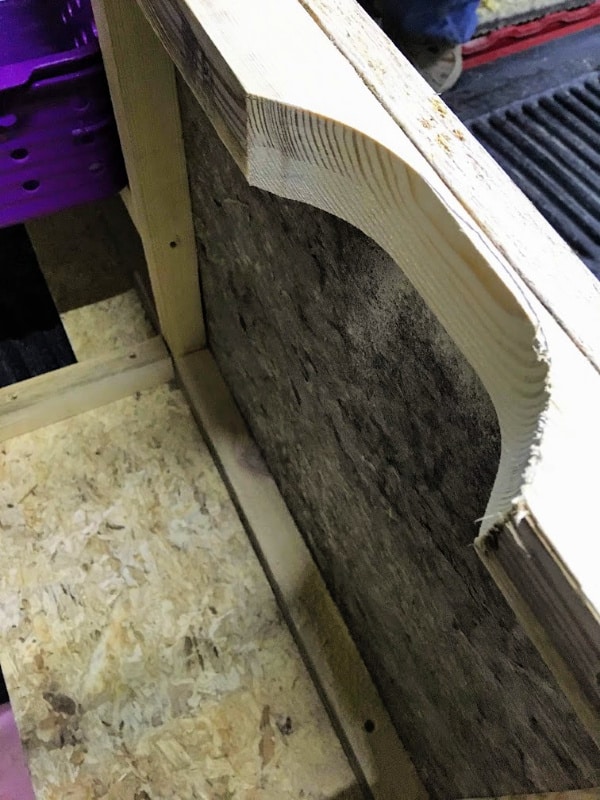
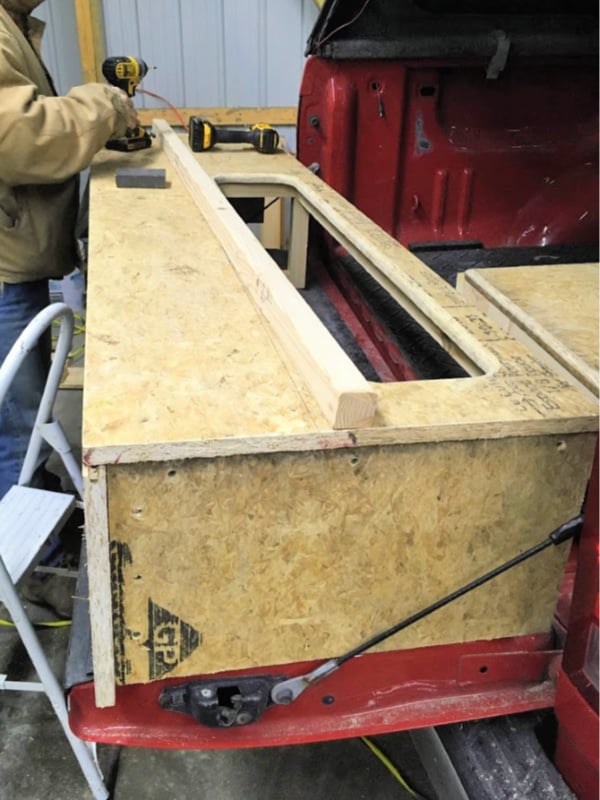
This picture should give you an inside look at how we built our truck camper cabinet. The division on the one end is for the simple water system.
How To Create Rounded Edges On The Access Area Of The Truck Camper Cabinet
We wanted to create a simple way to access all the storage in the cabinet and decided the best way to do that was to leave it as open as possible. We put in a bit more effort to give the opening rounded corners, but you don’t have to.
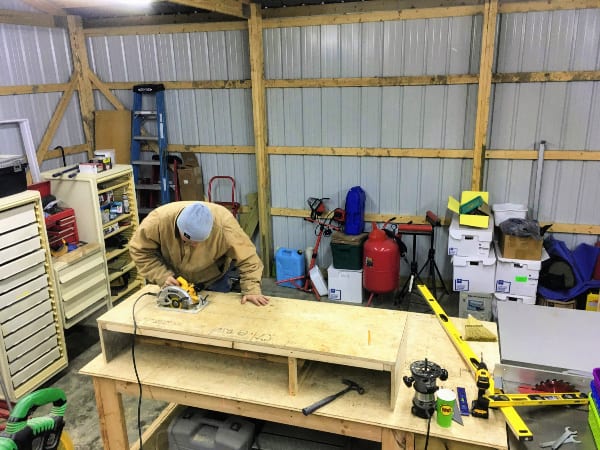
 How To Cut Out The Access Area Of The DIY Truck Top Camper Cabinet
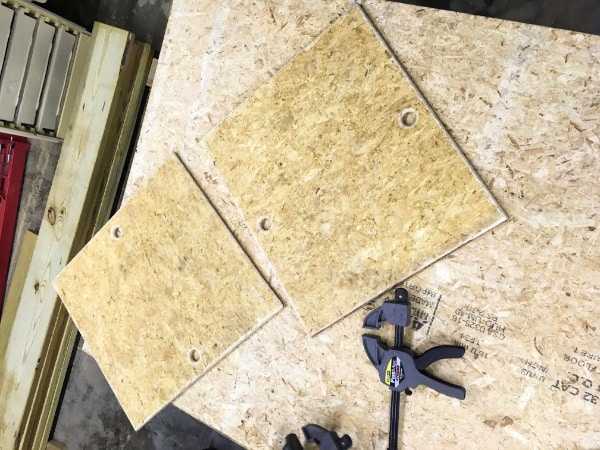
After measuring out the cabinet opening, my husband Jack cut the two longest sides of the opening out using a circular saw.
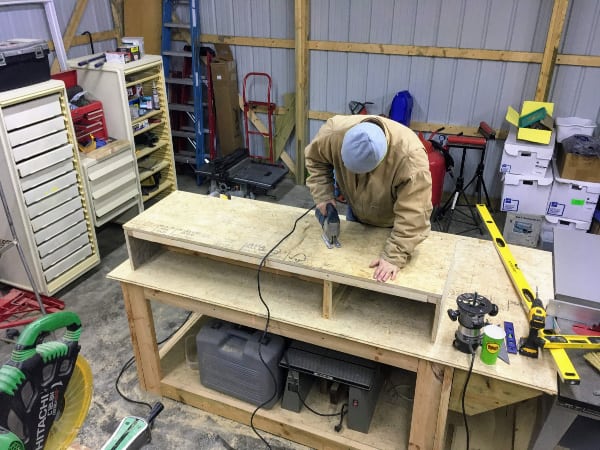
Once You Have Cut The Straight Sides Of The Opening, You Need To Cut The Corners
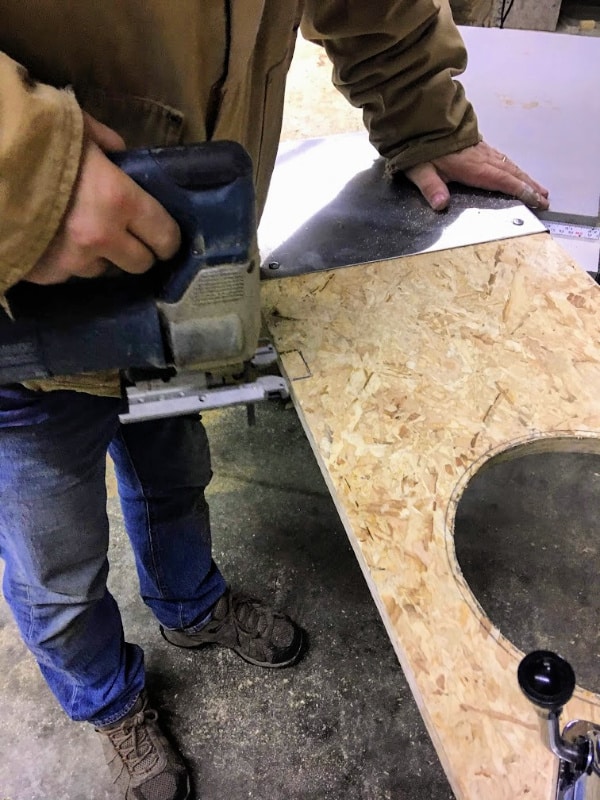
After making the cuts down the length of the opening, Jack used a jigsaw to cut out the rounded corners and ends of the cabinet opening.
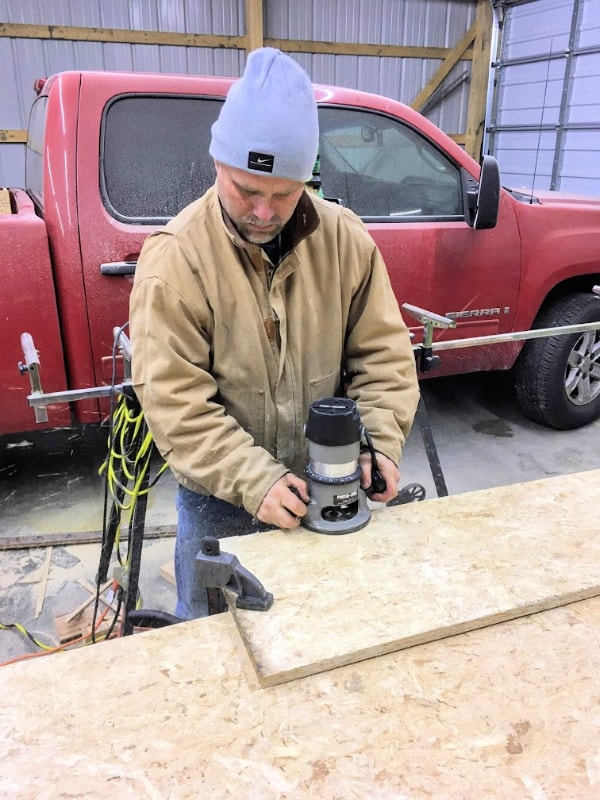
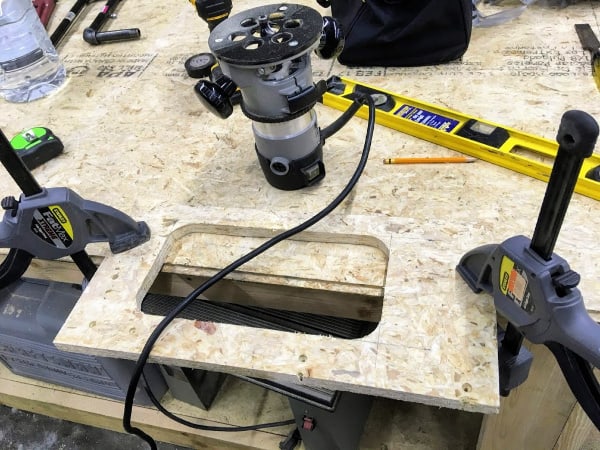
To Avoid Splinters From Rough Edges, Router The Edges Of The Storage Cabinet
Jack then used a router to smooth the edges of the opening. He did this to all the edges of the build to avoid splinters from the rough lumber.
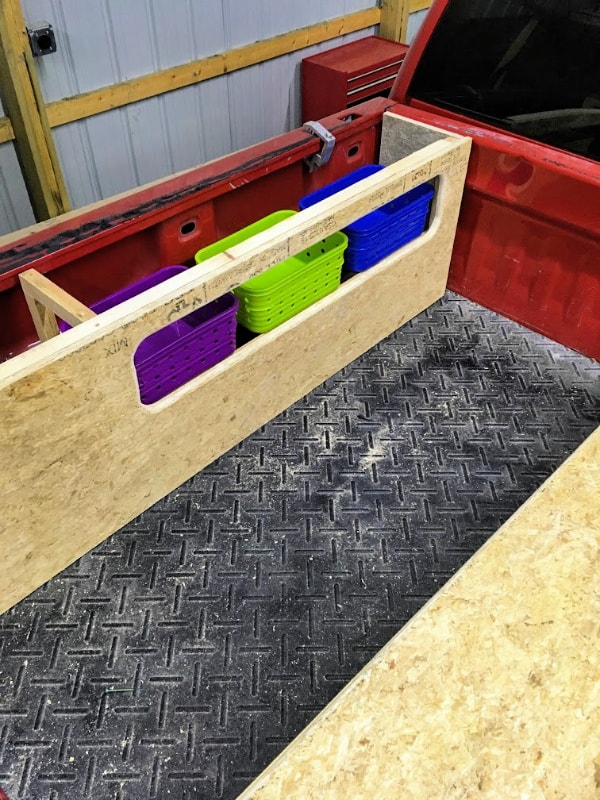
What The Access Area To The Storage Cabinet In The Truck Topper Camper Will Look Like
Jack put a piece of one-inch by one-inch lumber just under the opening and on the other side so that we could rest these containers that you see in the photos on them. We used these containers to hold small items. Underneath, we stored our clothes in packing cubes similar to these–we both have different colors, making it easy to identify whose is whose.
There Will Be Two Sides To Your Cabinet: One For Storage And One For Water
The empty side is going to become the fresh water and grey water storage area when the build is complete.
Now For The Counter Top Of Your Truck Topper Cabinet
After one trip in our truck camper, we decided there was one change we would have made to our countertop build. We found it hard to access the storage compartment once the camper was in night mode. To combat that problem, we need to make the part of the countertop that is above the storage area lift up. This could easily be done with one simple cut and a piano hinge.
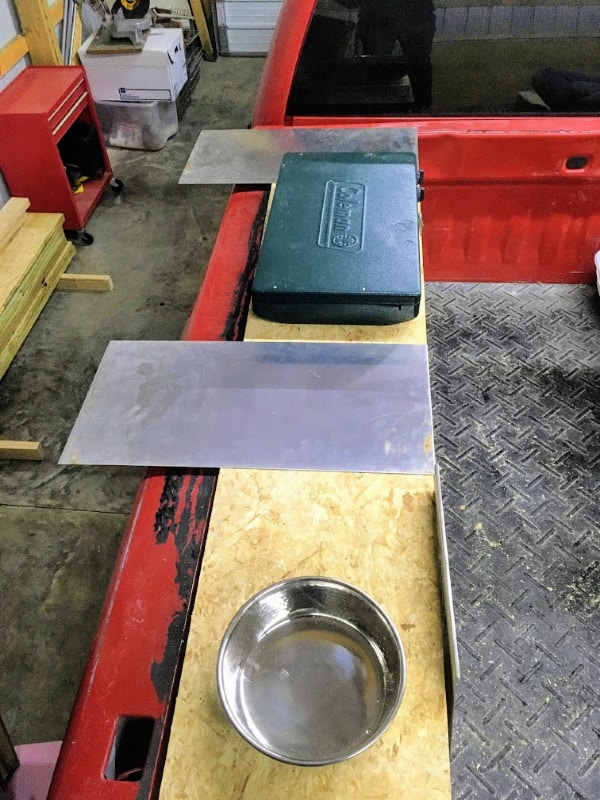
What The Counter Top Of The DIY Truck Topper Will Look Like In Kitchen Mode
At this point, we stopped and planned out the spacing for our countertop. We thought those two pieces of metal you see would protect the wood in those two areas from grease and other food splashes when we had to cook in the truck topper camper in lousy weather. They are, however, not necessary. Use what you have or nothing at all.
Router The Outer Edge Of The Hand-Built Truck Canopy Countertop
Rounding the outer edge of the cabinet is a vital step. The person who sleeps on the cabinet side of the build has the potential to rub up against the edge of the counter in the middle of the night. A rounded edge is much more forgiving on the skin than a square edge.
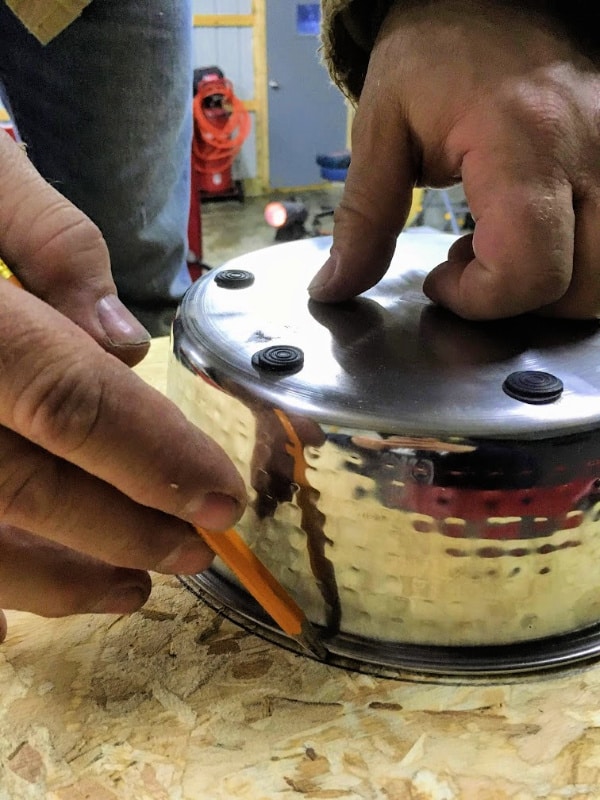
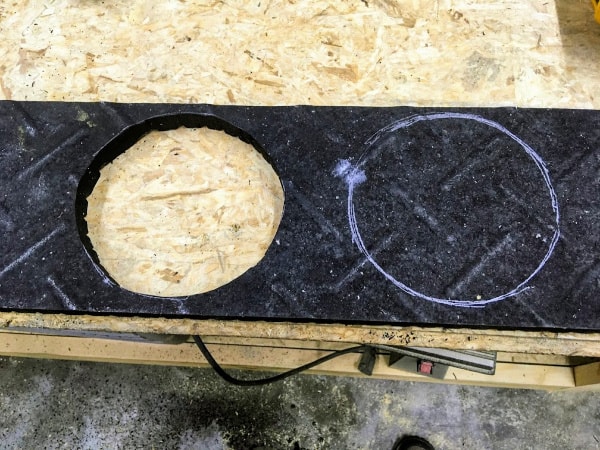
Trace The Sink In Preparation For Cutting A Hole In the Truck Camper Cabinet
We used a dog bowl for our sink as it was the only thing small enough to fit. We were okay with a small sink as its primary use is for brushing teeth before bed and hand washing.
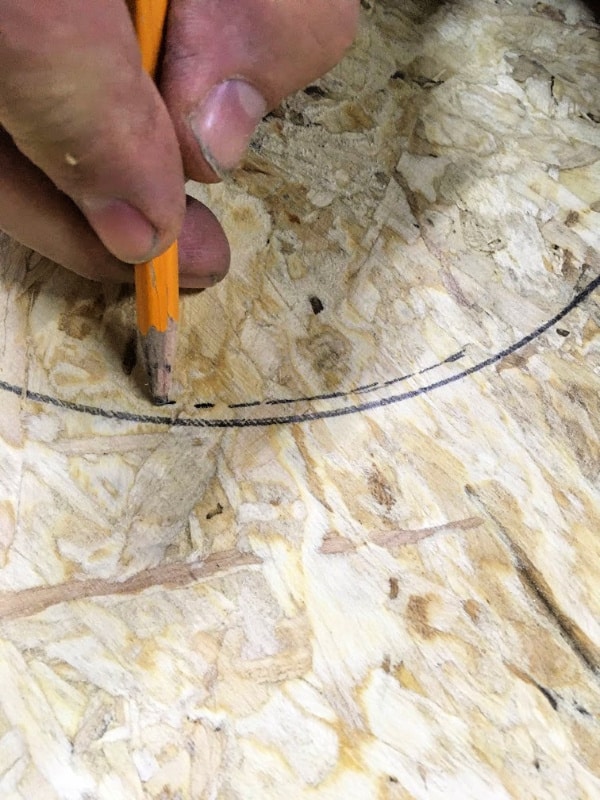
Now Trace An Inner Line Equal To The Width Of The Top Of Your Sink
The outer line you see is the lip of the dog bowl we used; the inner line Jack is drawing is the circumference of the dish itself and, therefore, the size the hole needs to be.
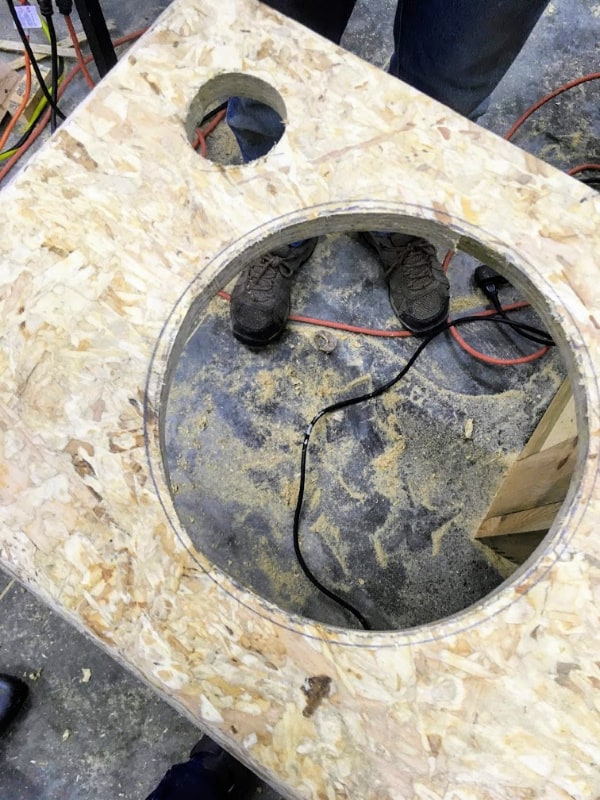
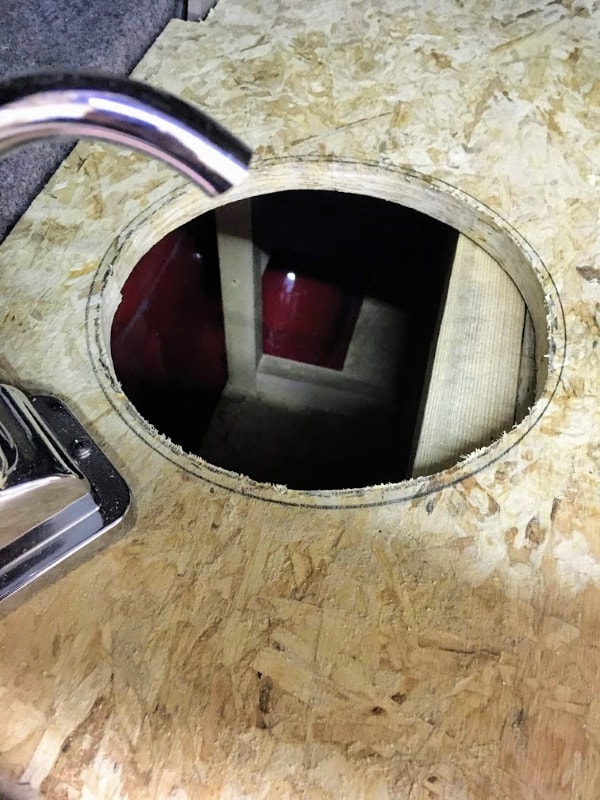
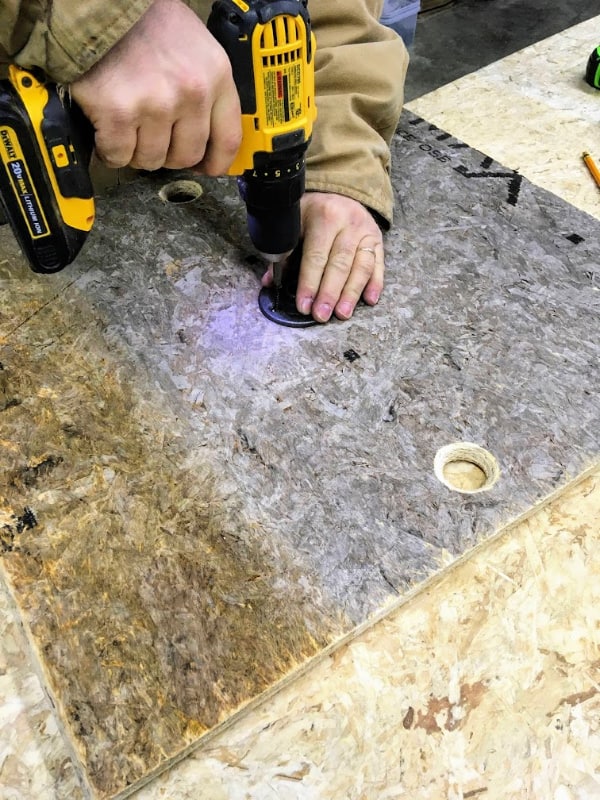
Cut The Hole For The Sink And The Faucet In the Countertop Of The Truck Top Camper
At this point, I headed out to do a few errands, so I missed out on how Jack decided on what size hole he needed to cut for the hand pump-style faucet.
A Look At What The Completed Sink Area Of The DIY Truck Canopy Camper
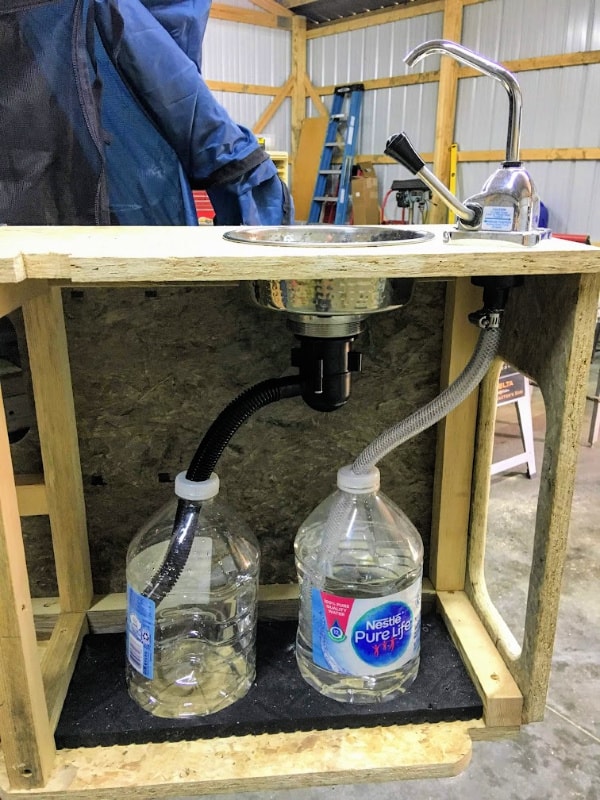
This is a straightforward way to get running water in a hand-built truck camper. You don’t need to be a plumber to do this.
Getting Closer To A Completed Hand-Built Truck to Camper Conversion
Things are getting pretty exciting at this point, but we still have a way to go until it is done.
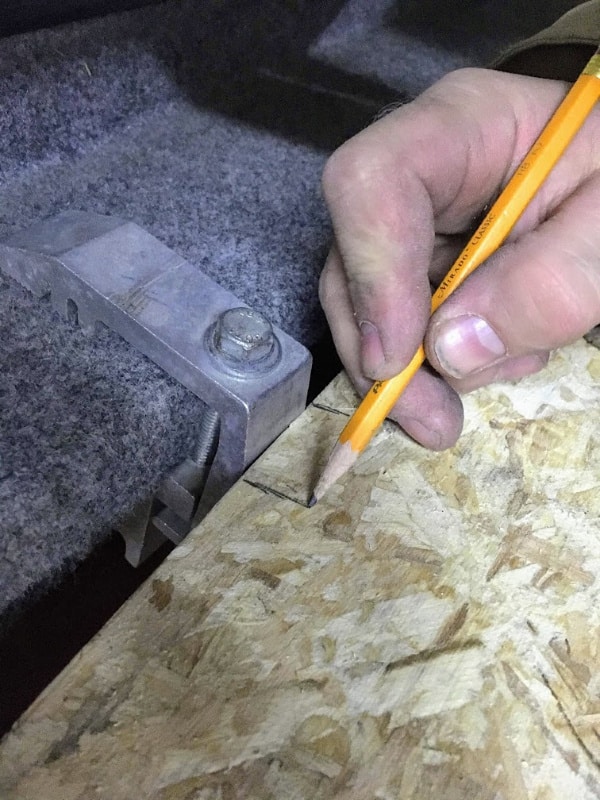
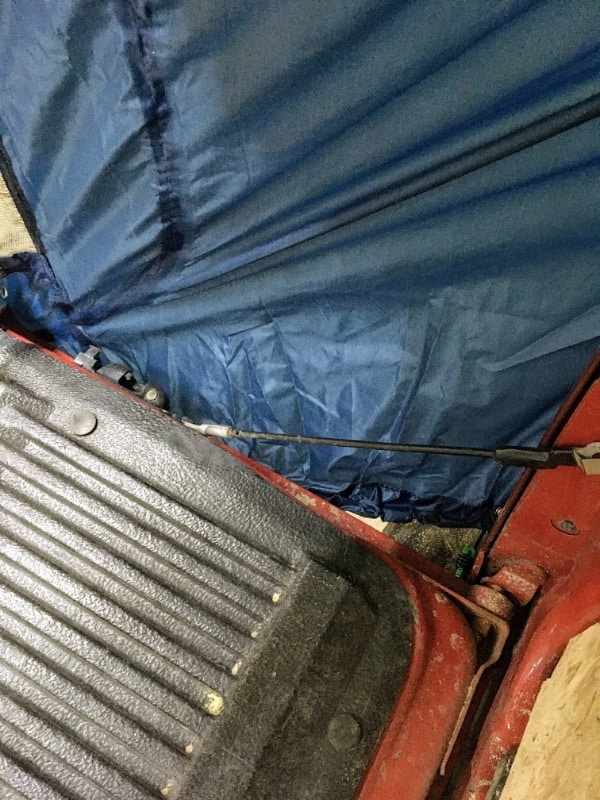
Cut Out A Notch In The Back Of The Cabinet To Make Room For The Truck Canopy Clamps
Truck canopies require clamps to adhere them to the truck bed. The clamps stick out a bit into the truck bed area. To get your cabinet to fit snugly against the truck bed wall, you are going to have to notch out an area or two of the countertop.
Use A Jigsaw To Cut Out The Hole In The Cabinet For The Truck Canopy Clamps
If you don’t have an electric jigsaw, a coping saw will work just fine for the few cuts you need to make with it during the building of your truck camper.
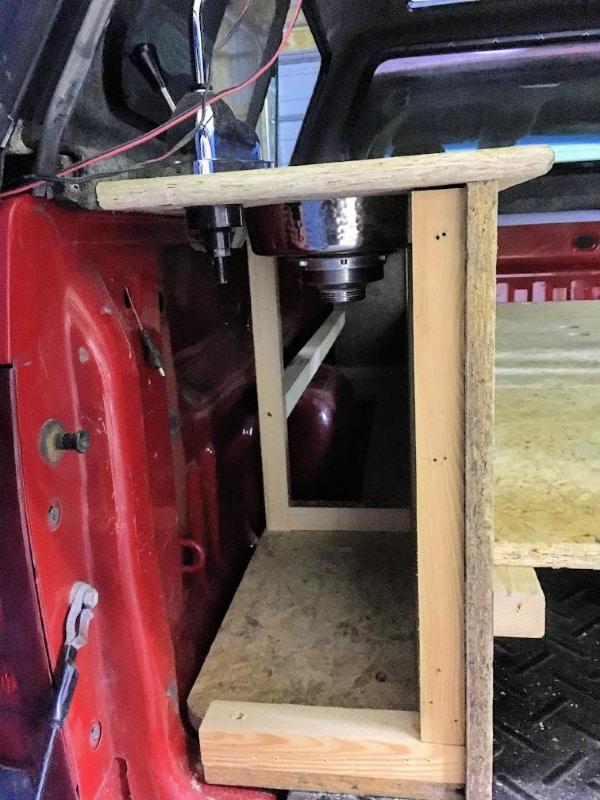
The Sink Might Get In The Way Of The Framing For The Truck Bed Camper Cabinet
Since the countertop is so narrow, the hole for the sink needed to go on top of the framing for the cabinet.
How To Fix The Problem Of The Frame For The Truck Cabinet Being In The Sink’s Way
To solve the problem of the sink getting in the way of the cabinet frame, we used the jigsaw to cut away the frame.
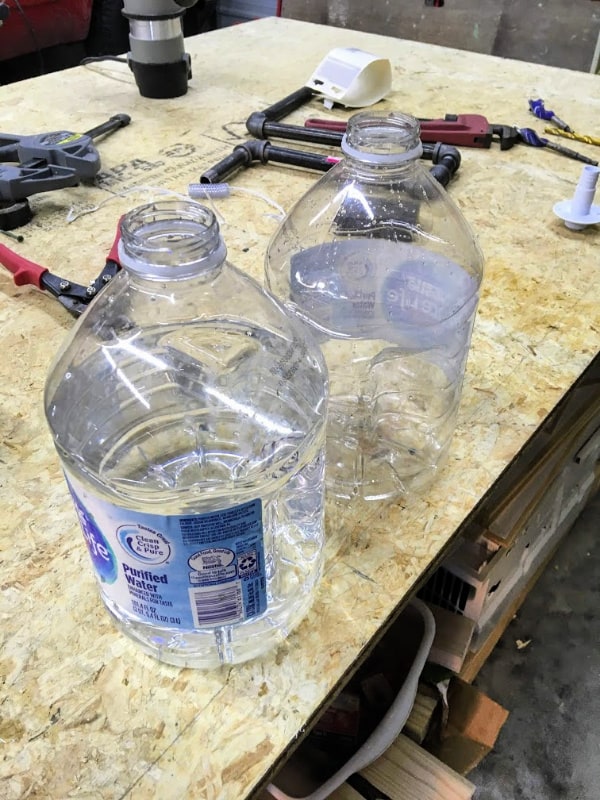
What To Use For A Fresh Water Tank And A Grey Water Tank In The Truck Top Camper
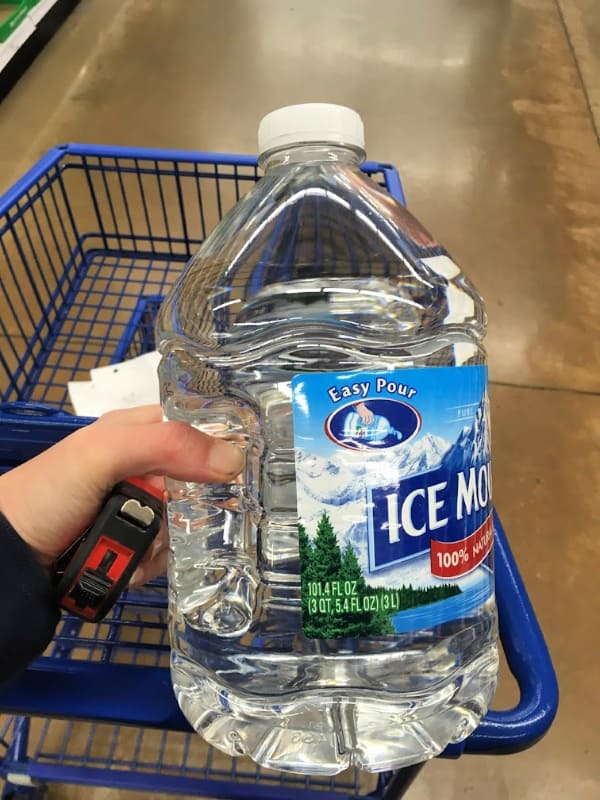
As Jack continued to work on the camper, I was sent to go and find two containers that fit the water system space. After walking all the aisles of the store and measuring different containers, I discovered that these round water bottles would fit perfectly. They are commonly found at pretty much any grocery store, so if we needed to replace one, it wouldn’t be hard.
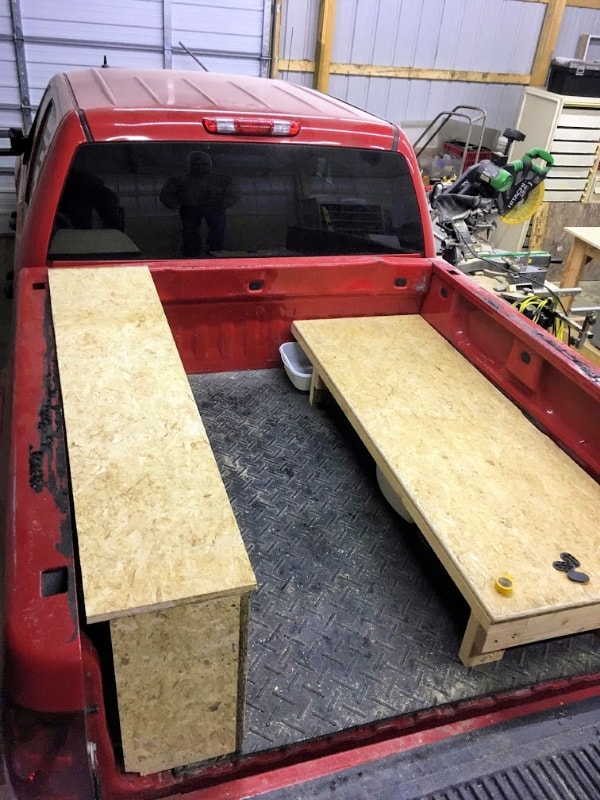
The Second Part Of The DIY Truck Camper Bed Is Made Up Of Three Pieces Of Wood
While I was gone, Jack built the second half of the bed platform. It is made out of three identical pieces. You will see why in a moment.
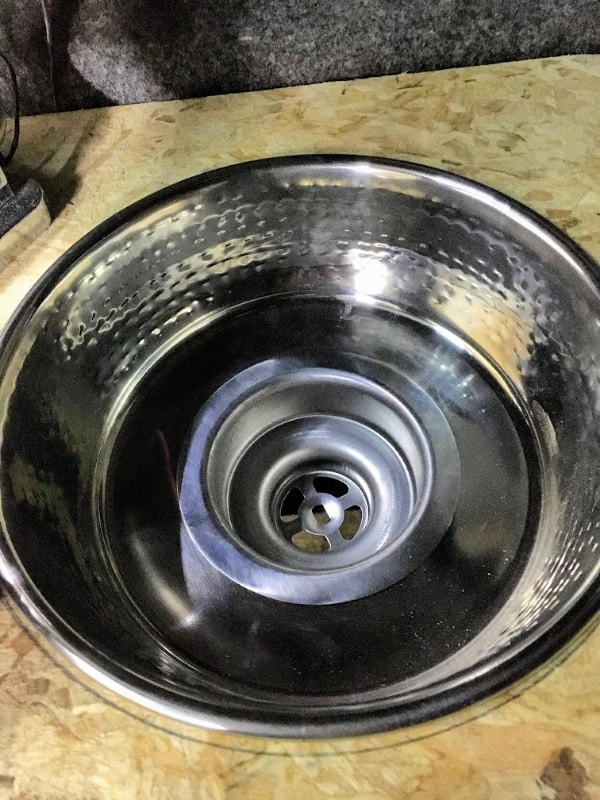
Cut A Hole In The Sink And Adhere The Drain: Top View
Jack also cut the hole in the bottom of the sink and glued the drain in place while I was off finding our water tanks.
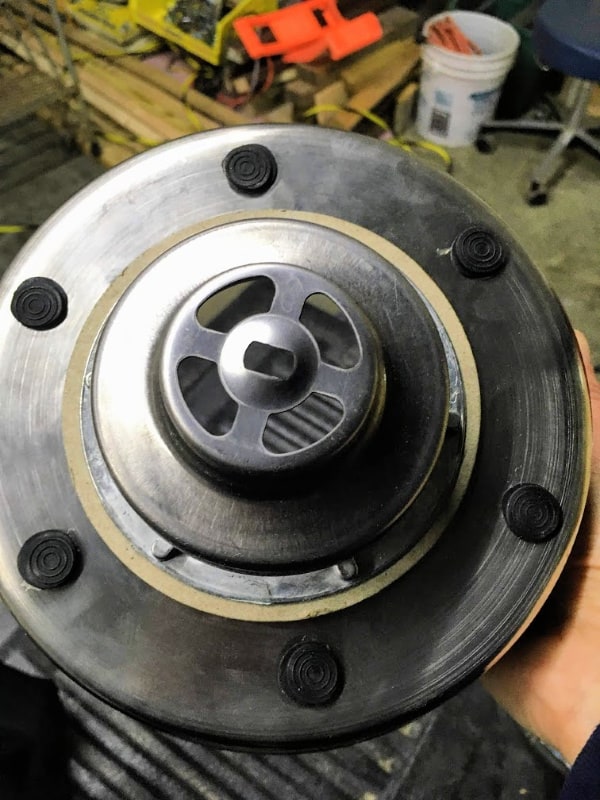
Bottom View Of The Sink Drain For The Self Built Truck Bed Camper
I was impressed with how easily my husband was able to turn a dog bowl into a working sink.
Putting The Ledges On That Will Hold The Second Half Of The Bed Platform
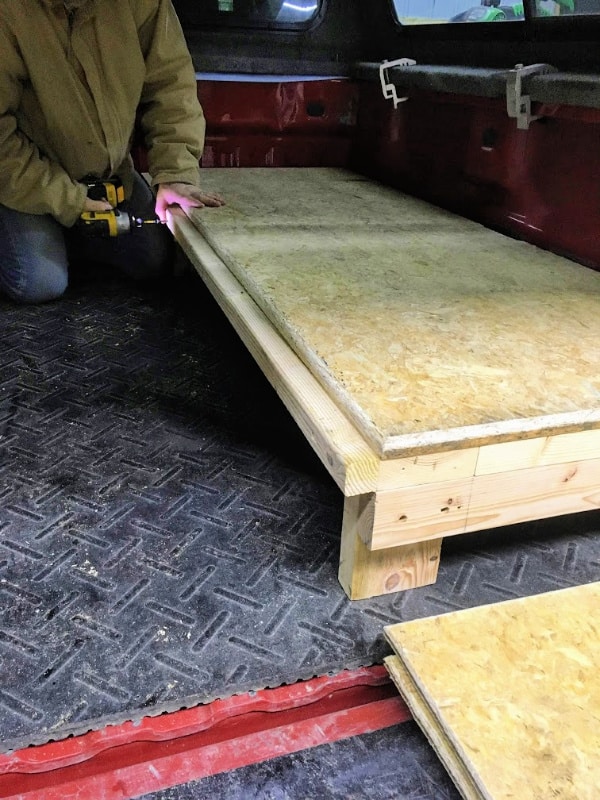
The second half of the bed frame is removable. It lays on top of two one-inch strips of lumber. One is found on the bed frame and the other on the cabinet.
The Second Bed Ledge Gets Fastened To The Truck Canopy Camper Cabinet
It is crucial to make sure the strip of wood for the bed attached to the cabinet is level with the piece attached to the bed frame. No one wants to sleep on an uneven bed.
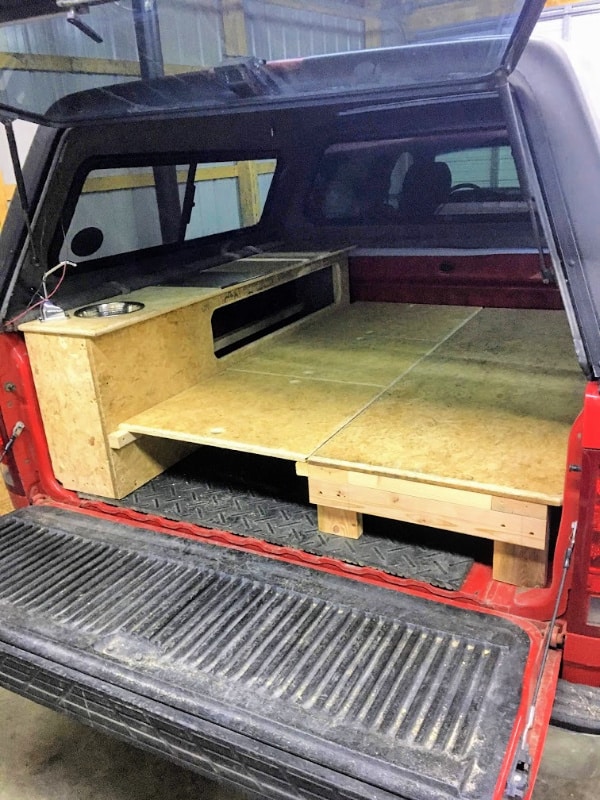
First Look At What It Will Look Like When Set Up For Two People To Sleep In It
This is how the camper will look when it is set up for the night. Minus the mattresses and bedding, of course!
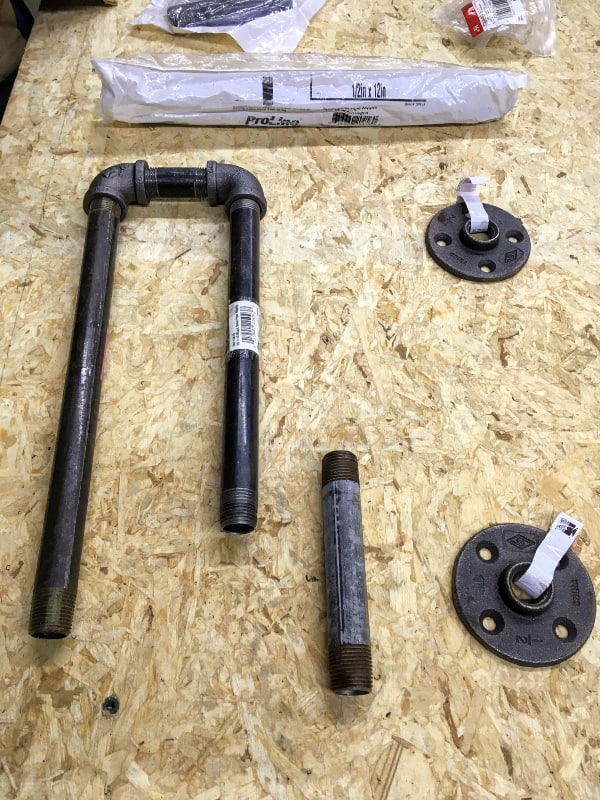
Pieces For The Swivel Table That Comes Apart And Stores When Camper Is In Sleep Mode
After getting inspiration from this video on YouTube, my husband went to our local hardware store to buy the pieces seen above to build a similar table in our truck camper. The table uses one of the three removable bed frame pieces as a base and another one as a tabletop. The third piece can be left in the top spot nearest the truck cab and act as another seating area–we used it to store our other tri-fold mattress during the day.
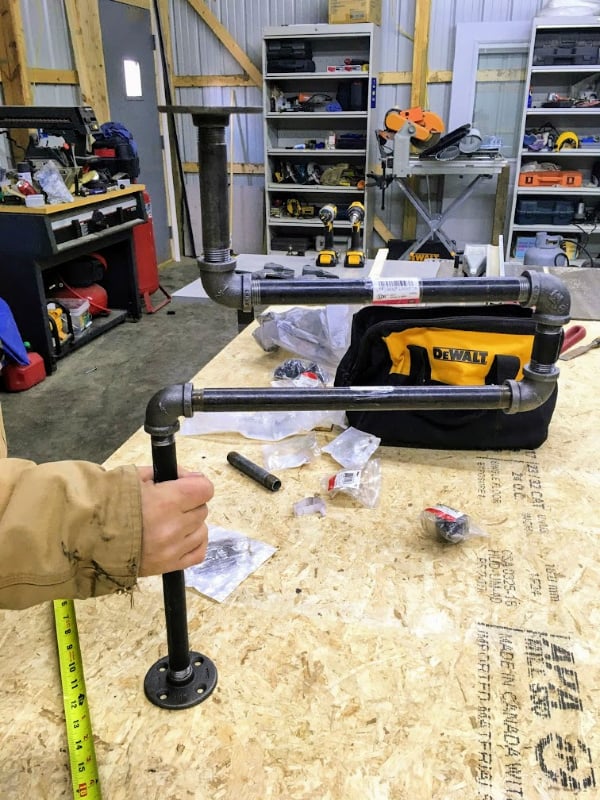
How The DIY Swivel Table Leg For The Truck Bed Camper Goes Together
Essentially you screw a base piece to the underside of two bed pieces, and then you fit the leg pieces together.
Find The Middle Of The Boards That Will Hold The Lower And Upper Base Plates For The Table Leg
The base of the top and the bottom of the table needs to be placed dead center in the two different bed pieces to make the sturdiest table possible.
Screw In The Base Plate For The Removable Swiveling Table Leg In The Truck Camper
Make sure you use screws that are the correct length. Too short, and they won’t hold the base well. Too long, and they are going to come out the top of your table.
A Look At What The Self-Built DIY Truck Topper Camper Will Look Like In Day Mode
Here is what the self-built truck bed camper will look like when it is in day mode. You can see that we were able to have a few inches of headspace left. When one mattress is on the bed platform, that space is mostly taken up, but you can still fit comfortably. Of course, the headspace you have will depend on the height of your truck canopy.
If Using A Truck Tent, Try It Out First At Home
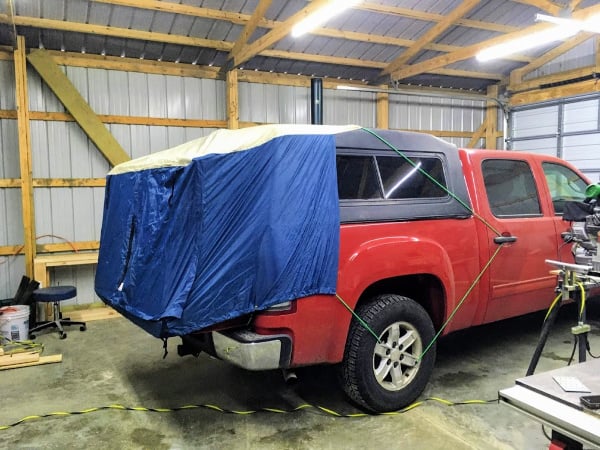
If you purchase a truck tent, I recommend fitting it on your truck at least once while you are still at home. Getting it on for the first time takes a lot longer than it will any time after that. Plus, if you put it on when you are still at home, you can figure out whether you need different tie-downs than what it came with to make it fit right.
A Truck Tent Adds A Significant Amount Of Space To Your DIY Truck Camper
As you can see, one HUGE benefit of a truck tent is the extra room it provides. It may only be around two feet, but when your bed is between 6 to 10 feet, every extra foot of living space you can add makes a BIG difference.
There Is A Solution To This Common Problem With Truck Tents
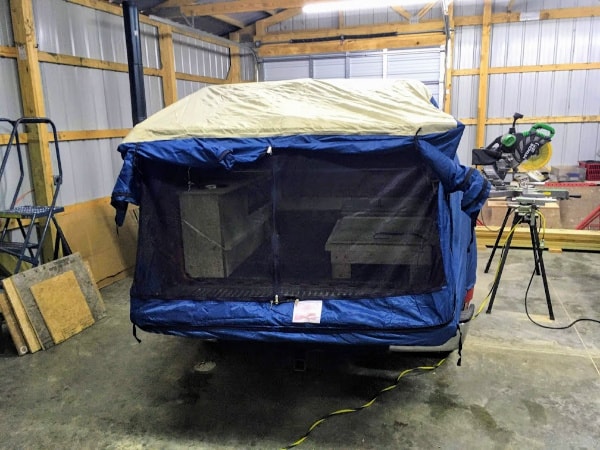
See that gap there between the tailgate and the tent? I researched a lot of different truck tents, reading dozens of reviews on each type, and all the different models had complaints of gaps. However, this gap is easy to fix by taking along two old towels with you and shoving them in the space.
The Last Step To The Self Built Truck Camper Was Installing The Simple Water System
Now that the guts of the truck camper are all built, it is time to add the last parts of the water system.
Cut And Router Out An Access Area For The Fresh And Grey Water
At first, Jack was going to create a door to access the water area, but then he just decided to cut the same type of hole as he did for the storage area. You could do either one or leave this end of the cabinet completely open.
Get The Water Tanks Ready To Install Into The DIY Truck Bed Camper
We didn’t want the grey water tank and freshwater tank to move around on bumpy roads, so we decided to build holders for them.
Create A Base For The Water Tanks To Sit In To Reduce Movement During Travel
We used a piece of an old horse mat that Jack had bought for the back of his truck from a farming supply store years ago. This looks pretty similar to what he used.
Here Is A Side View Of What The Simple DIY Water System Looks Like
And then I went into the house for a few minutes and came back to find this. Hopefully, you can figure out what Jack did just by looking at this photo. You need to have this part for the grey water and this for the fresh water.
And Now For Privacy Curtains For The Self Built Truck Canopy Camper
With the truck camper built, now is the time for the finishing touch–privacy curtains. These are essential if you plan to sleep in crowded campgrounds or rest areas.
Supplies You Need To Make Black Out Curtains For A DIY Truck Bed Camper
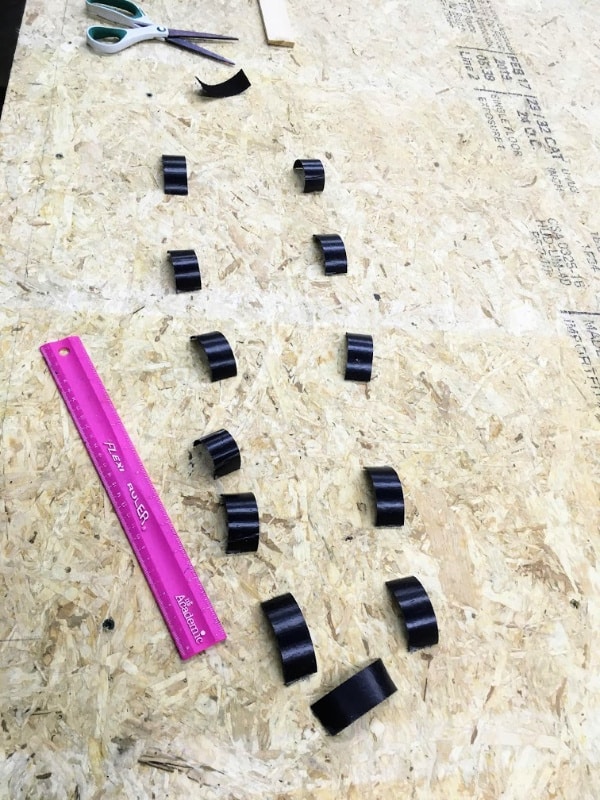
I used privacy curtains we already had but were not using. It doesn’t matter what color or material these are just as long as they don’t allow too much light to shine through. I adhered the curtains to the sides of the truck topper using stick-on Velcro that I bought in one long strip and cut them into 3-inch pieces. One roll left me a bit short, and I ended up having to buy a second one.
I only used the “hook” side of the Velcro, which is the rough side, as the carpet lining of our camper acted like the “loop” side. You will have to use both sides if you don’t have a lined canopy. That will make things a bit trickier as you will have to make sure your sides match up.
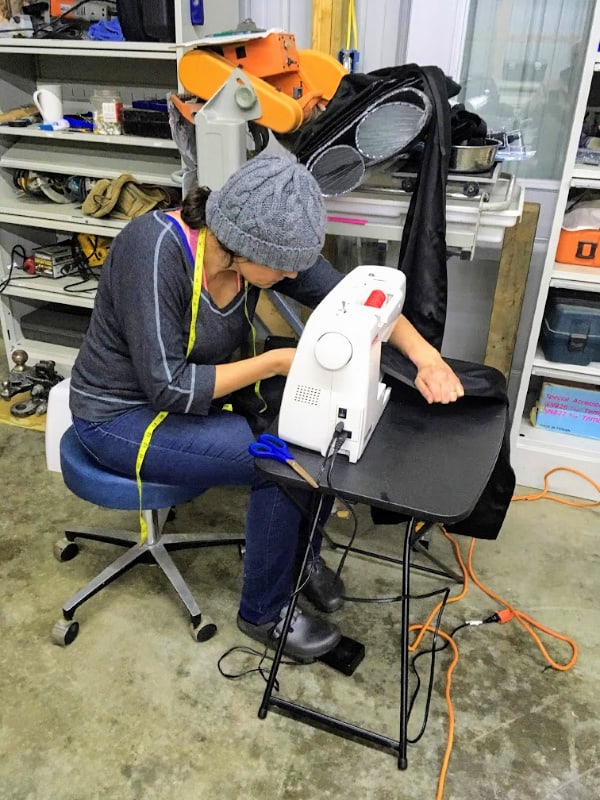
I cut the curtain to the size of the window plus at least two inches of overhang and one additional inch that I then folded under and sewed, creating a finished edge around all sides of the curtains. I made a window cover for both sides of the topper, plus one for each end and one for the small skylight window on the top of the camper.
How To Make Sure The Sticky Velcro Stays Stuck To Your Curtains And Camper Shell
Getting sticky Velcro to stick and stay stuck can be a problem. I took my curtains and Velcro inside and let them warm up to room temperature. Another tip is not to apply stick-on Velcro on a humid day.
Once I stuck the Velcro on, I covered it with a piece of board and then pushed down all my weight upon the area for roughly 30 seconds. I did this for every piece of Velcro. My husband still was not convinced it would stay stuck, so I tried sewing it on, but my machine didn’t like it.
In the end, to keep the hubby happy, I placed a straight pin through each piece as backup should the glue fail. I don’t think this was necessary, though, and it made putting the curtains on and taking them off a bit prickly.
Attaching The Curtains To The Truck Topper To Complete Your Pick Up Truck Camper
Thanks to a carpeted truck topper, the curtains went on and off with ease–and the glue did not come off on our first camping trip.
A Look At What We Pack In Our DIY Truck Bed Camper
Yes, this all fits in the camper. Well, sort of. I cheated a bit by using the back seat of the truck for kitchen supplies and food, but the rest did fit in the camper area.
Hanging Out In Our Newly Built Truck Canopy Camper
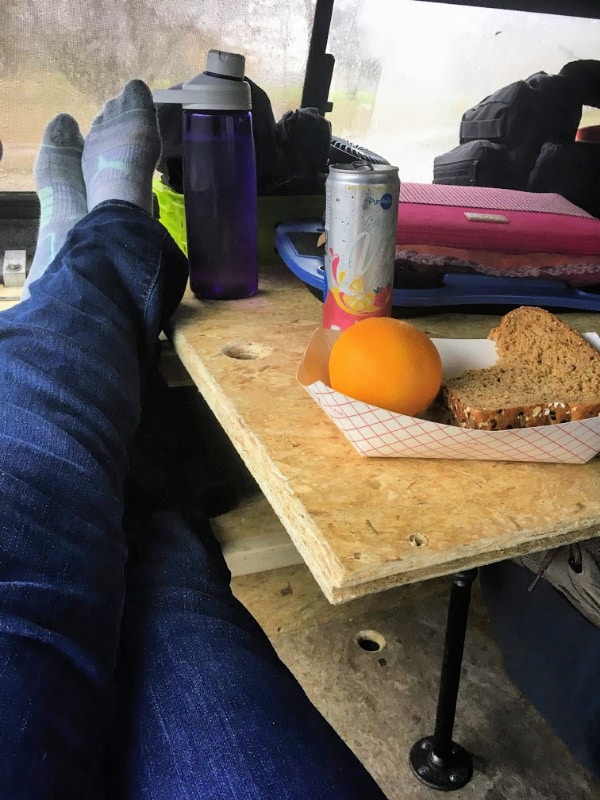
It was chilly the first day we had the camper out, but we stayed cozy inside the camper and enjoyed using the table we built for meals.
The Truck Tent In Full Camping Mode
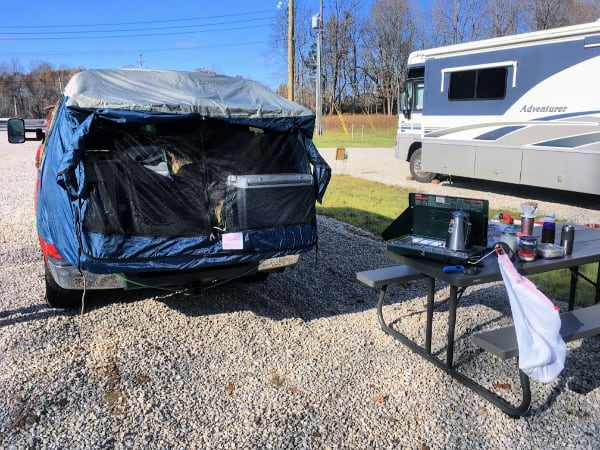
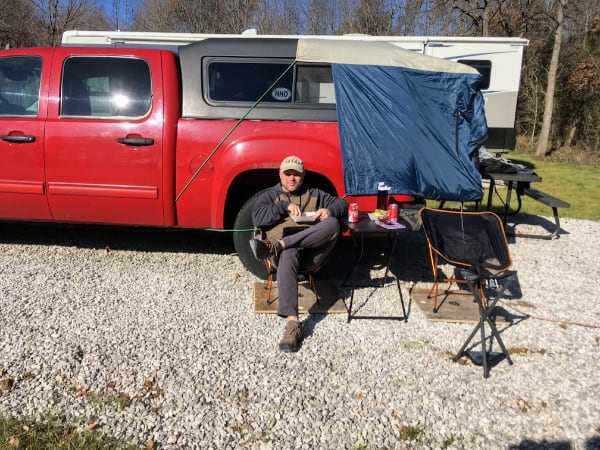
Here is a look at our self-built camper set up at the campground. We are just about to make our breakfast in this shot. The camp stove is out, and the kettle is boiling for tea, coffee, and instant oatmeal. The 12-volt cooler we own fit nicely in the extra space the truck canopy tent gave us. We bought the adaptor that allows us to plug it into 120 volts (a regular outlet) once we get to the campground.
One More Use For The Three Piece Bed Platform System In The Self Built Truck Camper
It was a warm sunny afternoon, and we wanted to eat outdoors and then do a little reading in the sunshine. We had one issue, though; our hiking chairs kept sinking into the gravel. So we used the bed platform pieces to keep our chairs from sinking. One more handy use for the three-piece bed system.
And Then Our Truck Died
Unfortunately, the first weekend we took our truck canopy camper out, our GMC Sierra, with its just under 6-foot bed, decided to need a repair that would cost about as much as its trade-in value. After much consideration, we decided to sell it to a mechanic who could fix it for much less than we could and bought a newer F250 with an 8-foot bed.
We planned to transfer the “guts” of our homemade truck camper build to the Ford as we were pleased with how the build functioned during our first-week camping in it. To finish the recreation of our truck bed camper, we needed a longer canopy for the longer bed in the Ford and perhaps a few tweaks in the design here and there to make it fit.
However, while we were searching for a reasonable price on a used truck topper, an older but still in excellent shape pop-up Northstar slide-in truck camper came up in my Facebook Marketplace feed at a price that was too good to say no to. So we jumped on it.
Got A Truck And No Canopy? No Problem
As I mentioned in the beginning, you don’t need a truck canopy to make a truck bed camper; you could buy a truck bed tent, bring along two camping cots, and call it done. This setup will work fine for most camping situations. However, if you can find a reasonable price on a used truck topper, it might be cheaper to make what we did–plus, you can camp anywhere in a truck topper camper, including rest areas (we did, we didn’t use the truck tent).
If you sleep in the back of your vehicle instead of a self-contained RV, you don’t qualify for a Boondockers Welcome or Harvest Host membership, but you can use Hipcamp to find unique campsites. Check out our post about our first time using Hipcamp. (spoiler alert, it wasn’t our last time using Hipcamp).
 How To Cut Out The Access Area Of The DIY Truck Top Camper Cabinet






Hello Jack and Victoria,
I enjoyed you DYI Camper Designs and explanations.
I travel thousands of miles from Southern Utah to Alaska etc… I built a basic bedframe and next a custom (cook box) which slides under the bed. I prefer to stay close to my mining equipment stored in my 10.5′ trailer. Like you two,
I don’t mind sleeping and preparing meals from the truck camper. Actually quite convenient. And, we save in lodging costs.
Thanks for your specific descriptions and details,
Dave
My husband and I have yet to travel to Alaska! We want to, and when we do we plan on camping in our truck camper.
This is GREAT! Did you sell your set up yet?
I haven’t gotten around to listing it yet. Busy summer!
We built a bed frame and under bed storage in our van for our trip around the Pacific Northwest in 1991, but I am really impressed with your design, especially the sink, table and counter area. Great job !
Thanks!
Hello,
My wife and I decided to give the Truck bed design a go. Yours is Fantastic and Im going to mirror it but add a small portable 12V refrigerator and Porta potty storage somewhere…
Thankyou for the awesome details and pics during the build.
Hi Jeff, did you ever get around to finishing that build? I sure would like to see some pics. I am getting ready to build the same w/ potty n shower for my 8 ft bed. Thanks, Cindy
Hi, As a matter of fact, I just finished the Electrical portion. All modules are built, carpeted and functioning. They are sitting in the garage put together. I have had the 12v fridge running for couple days running off the Battery generator testing out the Electrical.
It has 12 and 110 Power, Solar charging capable, Plumbing for Sink, gray and clean water storage, Fridge, Gas Coleman stove, Remote Diesel Heater for truck bed with Ducting and a Porta potty that fits under the bed.
These will all be affixed to the bed using hidden straps. so they don’t bounce around.
Send me a link and I can send some pics if you like.
Thank you Victoria and Jack for the Inspiration!
Jeff
Jeffrey sure would love to see your photos as well. I have Tundra max cab w/ short bed. Looking for ideas. I plan on traveling w/2 lg dogs. I have bought a lithium 1300 battery, 350 watt heater, 4 gal h2o jug, porta potty and portable fan. Basics to get me started. Now need ideas to build around it for functionality. Loving ideas in article. Pictures get my creativity going and I love what people can come up with. If u can, Please share ur photos Much appreciated. Janet
Hi! I really like how you set up your truck camper, but I do have a question. Are the bed and storage structures attached to the floor/sides of the shell? Thanks 🙂
No, we did not. It did not seem to shift. We didn’t take it out on very rough roads though. If you are planning to, then yes you might try and anchor it somehow.
nice job, and yes Sewing Machines don’t like Velcro,lol
Would you please say how high your bed frame was off the floor?
And how deep was your storage unit?
Those look perfect. You have the same exact topper I do so if you’d tell me those measurements it would sure give me a starting place. Thanks.
Unfortunately, I can’t since we don’t have this set up anymore (our truck died). But, we based it off the wheel well. The bed sat on top of it.
Nicely done! We’ve done it all with vans, trucks, and trailers since the 70s. Canopy Truck tents are difficult to find, like yours. I had hoped that our canopy from the van would work but not. Although, it did work on the Tahoe nicely.
If you still have yours, please drop me a note, thanks!
We are not selling ours at this time but they are available on Amazon.
Great setup guys, thanks for the info. Could you please let us know what size pipe pieces (diam’s & lengths) you used for your table? It also looked like one of your in use photosof the table top appeared to be more than just the single sheet thickness. Was that an improvement/plan modification or am I just seeing things?
Hi Ed, No the table is just a single sheet thickness. And since we no longer have this build I, unfortunately, cannot take and share the measurements.
I’m retiring in a few months and looking to build out my F350 so I can migrate with the animals. Love your rig. Would love to see more pics, videos extra. Thanks for sharing.